Docker를 이용하여 Jekyll Chirpy Theme으로 Github Pages 블로그 생성하기
Docker로 Jekyll Chirpy Theme을 사용한 Github Pages 블로그를 설정하는 방법을 정리한 글입니다.

Github Pages 생성
먼저 아래 글에서 설명한 내용을 토대로 최신 Node.js LTS를 설치해준다.
https://sirius-mhlee.github.io/posts/wsl-nvm-nodejs-install/

Github Pages와 Jekyll을 이용하면 나만의 블로그를 만들 수 있다. 이 블로그는 Chirpy Theme에 취향에 맞게 조금씩 수정을 한 것이다.
Github Pages는 Repository 이름에 username.github.io를 입력하면 생성된다.
나는 보통 Github Repository를 생성할 때 README 파일을 추가하도록 체크해 준다.

생성이 완료되면 git clone으로 내려받아 준다.
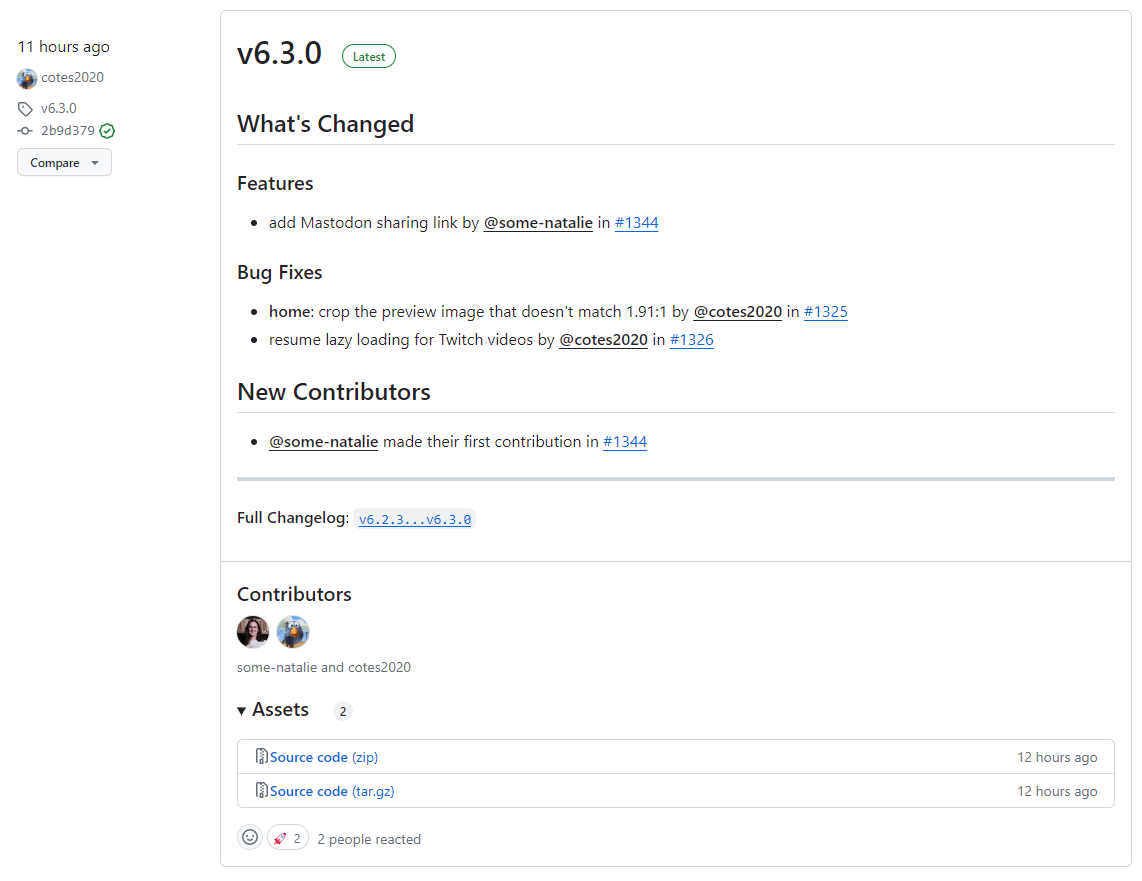
Chirpy Theme 설치
Chirpy Theme은 현재도 활발하게 업데이트 되고있는 Jekyll Theme이다.

Release 페이지에서 원하는 버전을 다운받으면 된다.
나는 v7.2.4를 다운받았다.
그리고는 압축을 풀고, git clone으로 내려받은 Repository 폴더에 모든 파일을 복사해 준다.
1
2
unzip jekyll-theme-chirpy-7.2.4.zip
cp -a jekyll-theme-chirpy-7.2.4/. sirius-mhlee.github.io/
다음으로 Chirpy Theme에 포함된 tools/init.sh 스크립트를 이용하여 초기화를 해주어야 하는데, Release 페이지에서 직접 소스 코드를 받았기 때문에 몇 가지 단계는 삭제해 주어야 한다.
1
vi ./tools/init.sh
main함수의check_env부분을 주석 처리 해준다.
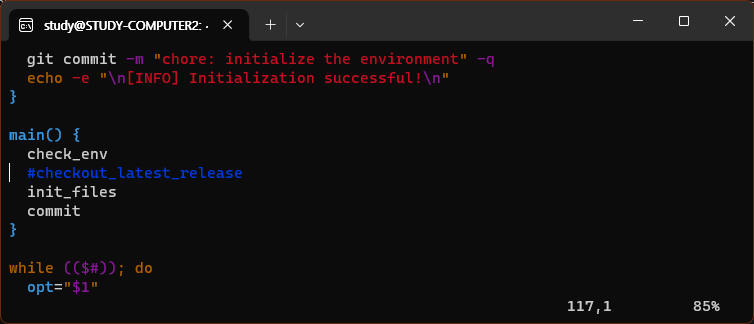
reset_latest함수의git reset부분을 주석 처리 해준다.
commit함수의git add와git commit부분을 주석 처리 해준다.
tools/init.sh 스크립트는 내부적으로 git clean을 하기 때문에, 현재 폴더에 git 수정 사항이 없어야 한다.
위에서 수정한 tools/init.sh 스크립트와 복사한 파일들을 미리 commit 해두자.
1
2
git add .
git commit
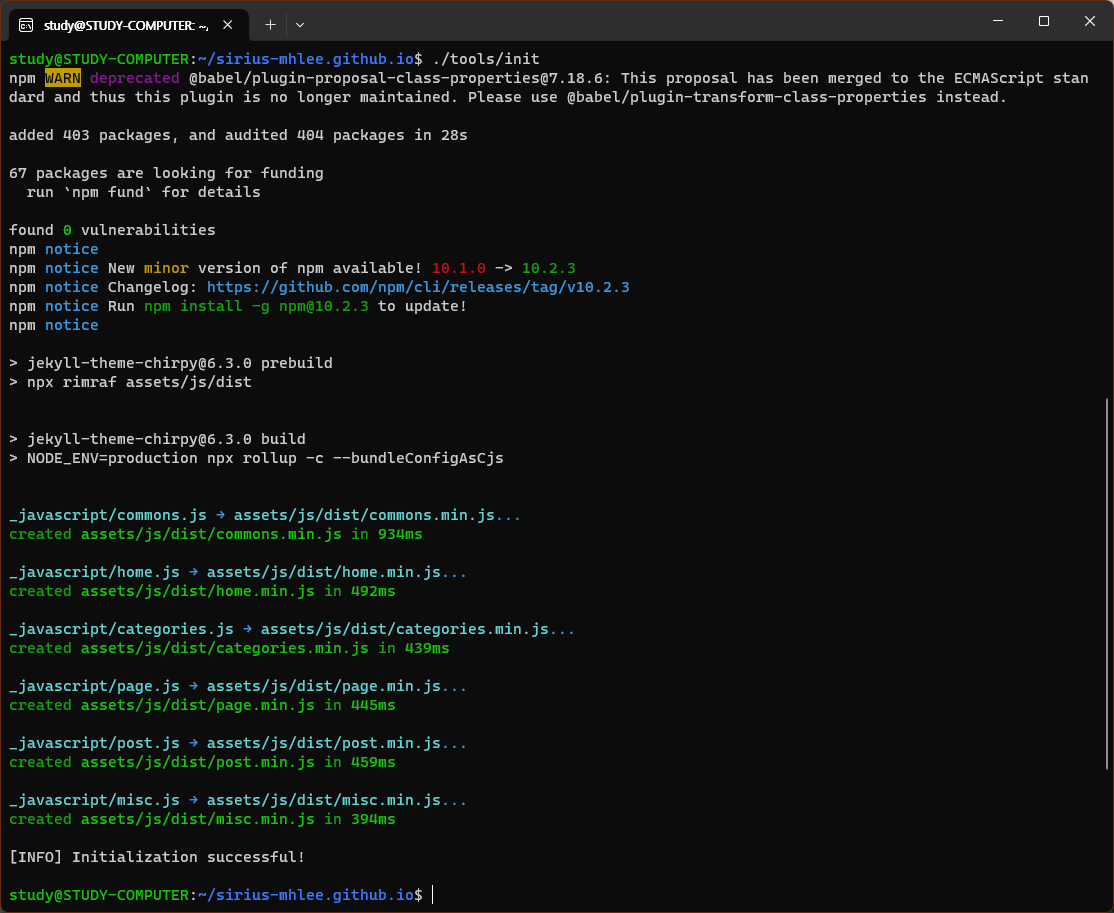
그리고 tools/init.sh 스크립트를 실행하면 된다.
1
./tools/init.sh
Docker Image 빌드
이제 Ruby와 Jekyll을 설치하고 실행만 하면 되는데, Ruby 공식 Docker Image를 이용하면 아주 쉽게 실행할 수 있다.
먼저 아래와 같은 Dockerfile을 만들어 준다.
1
2
3
4
5
6
7
8
9
10
11
12
13
14
15
16
17
18
19
20
21
22
23
24
FROM ruby:3.1-slim-bullseye

RUN apt update && apt install -y --no-install-recommends \
    build-essential \
    git \
    tzdata \
    && rm -rf /var/lib/apt/lists/*

ENV TZ=Asia/Seoul
RUN ln -snf /usr/share/zoneinfo/$TZ /etc/localtime && echo $TZ > /etc/timezone

COPY entrypoint.sh /usr/local/bin/
RUN chmod +x /usr/local/bin/entrypoint.sh

RUN gem update --system && gem install jekyll && gem cleanup

EXPOSE 4000

WORKDIR /srv/jekyll
RUN git config --global --add safe.directory /srv/jekyll

ENTRYPOINT [ "entrypoint.sh" ]

CMD [ "bundle", "exec", "jekyll", "serve", "--force_polling", "-H", "0.0.0.0", "-P", "4000" ]
Ruby 3.1 공식 Docker Image에 Jekyll을 설치하고 실행까지 해주는 Docker Image 이다.
사용된 entrypoint.sh는 다음과 같다.
1
2
3
4
5
6
#!/bin/bash
set -e

bundle install --retry 5 --jobs 20

exec "$@"
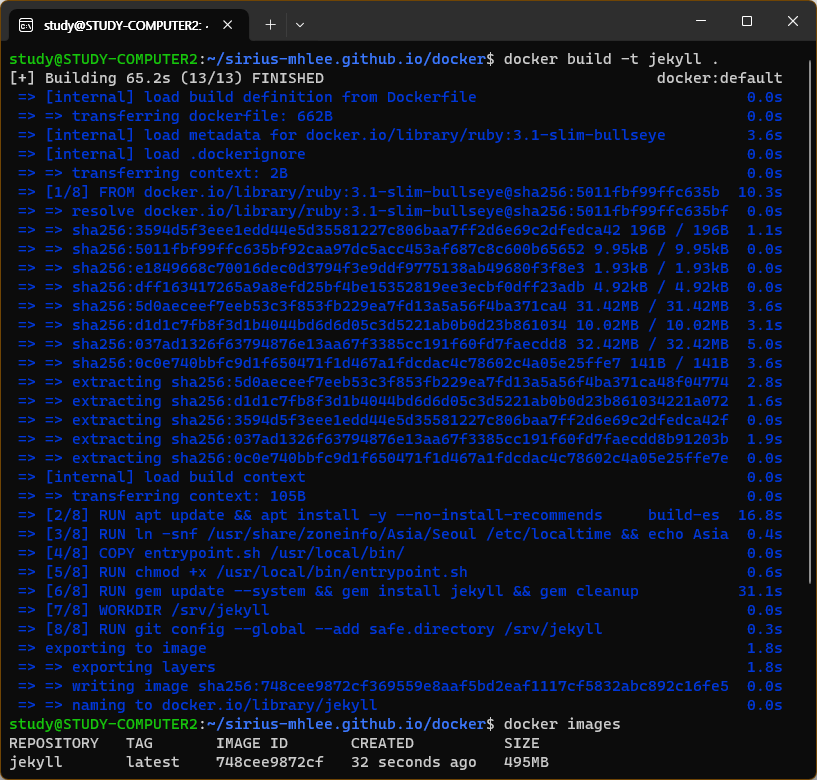
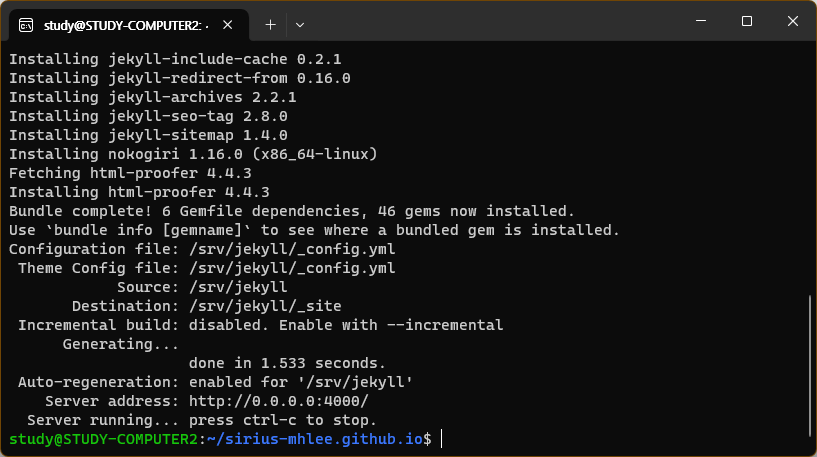
Docker Image를 빌드하고 만들어진 이미지를 확인해 보면 정상적으로 빌드가 된 것을 알 수 있다.
jekyll이라는 이름으로 이미지를 만들었다.
1
2
docker build -t jekyll .
docker images

배포하기
만들어진 Docker Image로 Docker Container를 실행하고 결과를 확인해 보자.
아래 명령어를 git clone으로 내려받은 Repository 폴더에서 실행해 준다.
1
2
docker run --name blog --volume="$PWD:/srv/jekyll" -p 4000:4000 -d jekyll
docker logs blog

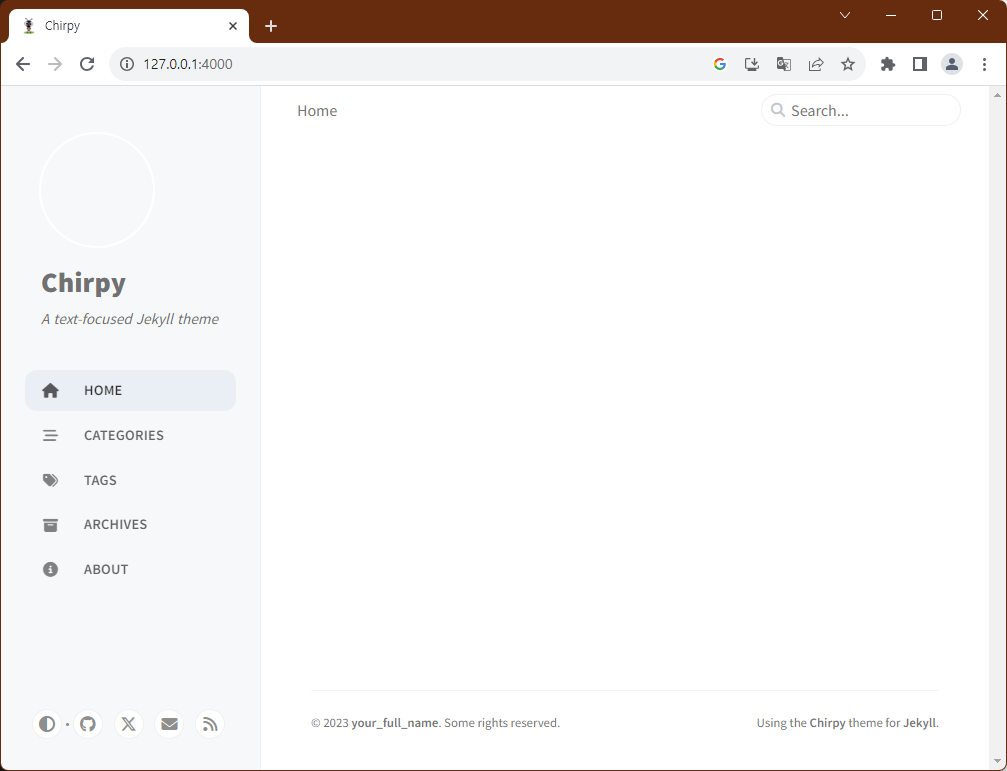
127.0.0.1:4000으로 접속해 보면, 드디어 완성된 블로그를 확인해 볼 수 있다.
지금까지 수정한 모든 내용들을 commit 해주고 git push로 Github Pages에 반영해 주자.
1
git push origin main
마지막으로 Repository의 Settings > Pages에서 Build and deployment의 Source 설정을
Github Actions로 수정해 주면 Github Pages에 수정 사항이 push 될 때마다 자동으로 빌드하고 배포하게 된다.

username.github.io 주소로 접속해 보면 정식으로 배포된 블로그를 확인해 볼 수 있다.
그 외 Chirpy Theme의 기본적인 사용 방법은 아래 주소에서 확인할 수 있다.
이제 본인의 취향에 맞게 디자인도 변경하고, 좋은 글도 쓰면서 멋진 블로그를 가꾸어 나가면 된다.